Holiday Dessert Board With Homemade Gingerbread Cookies
A deliciously sweet dessert board that will keep Santa coming back for more.
Published: Mar 05, 2025 | Modified: Mar 05, 2025
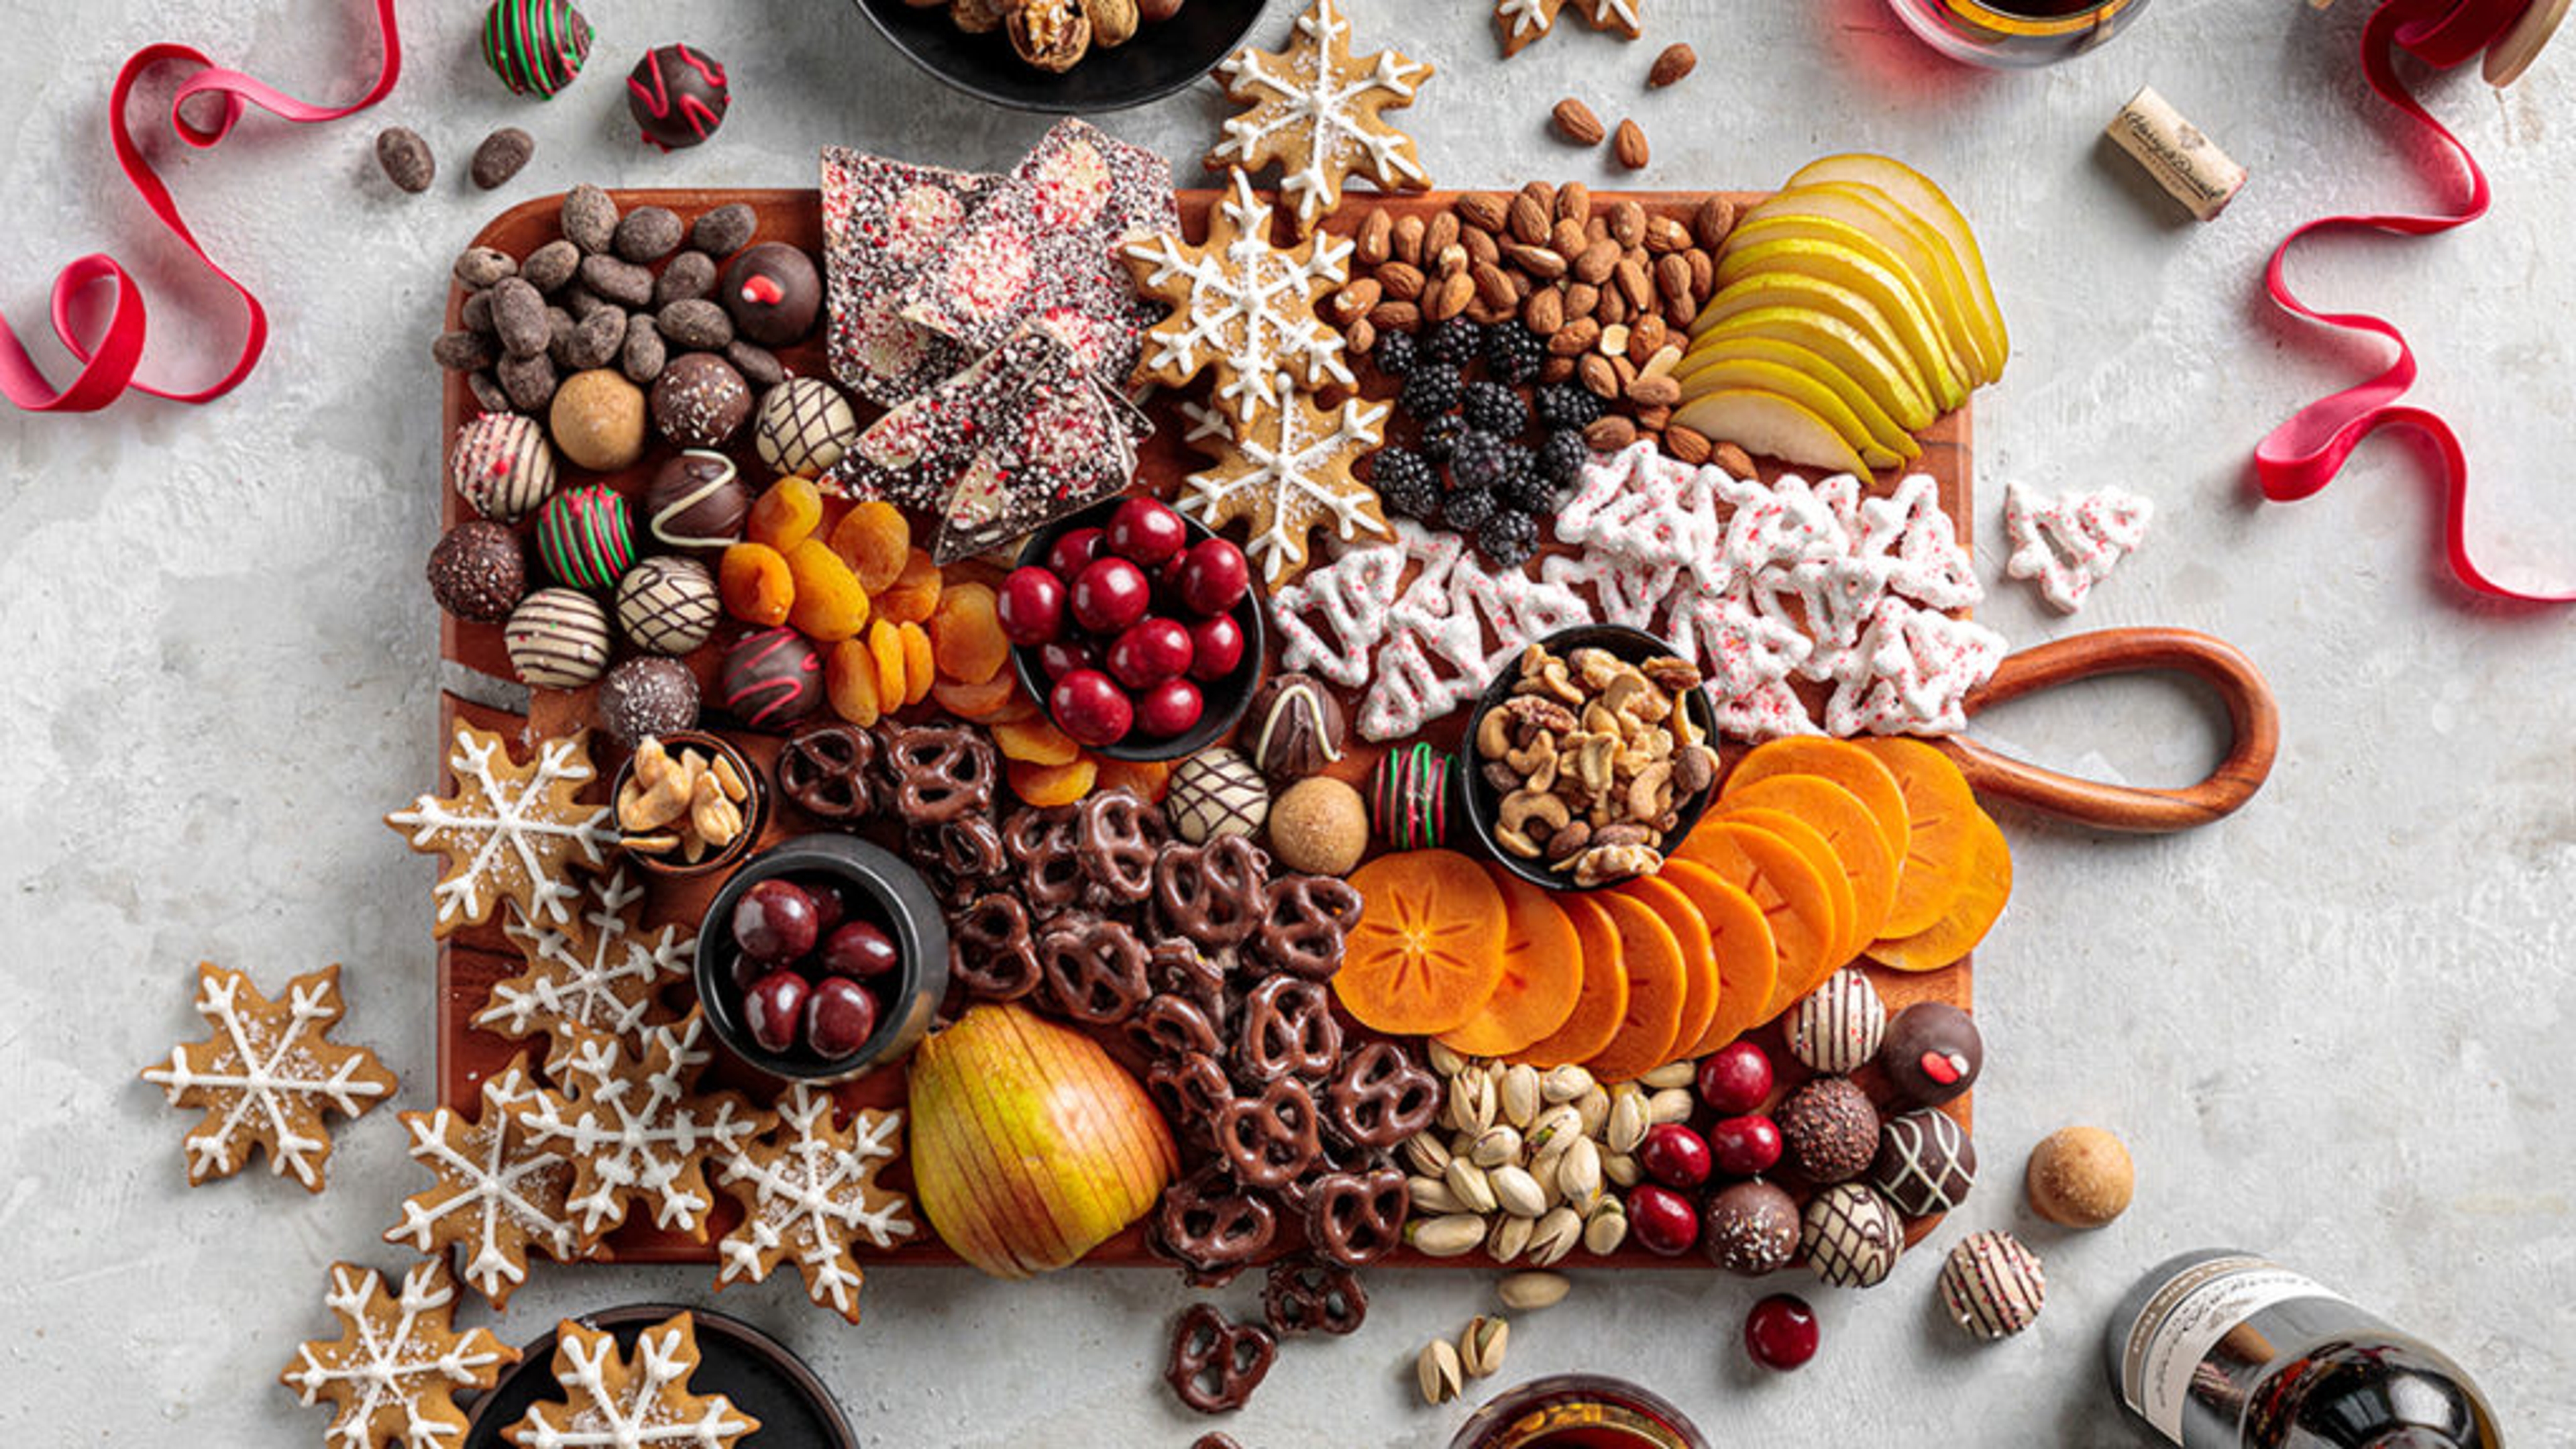
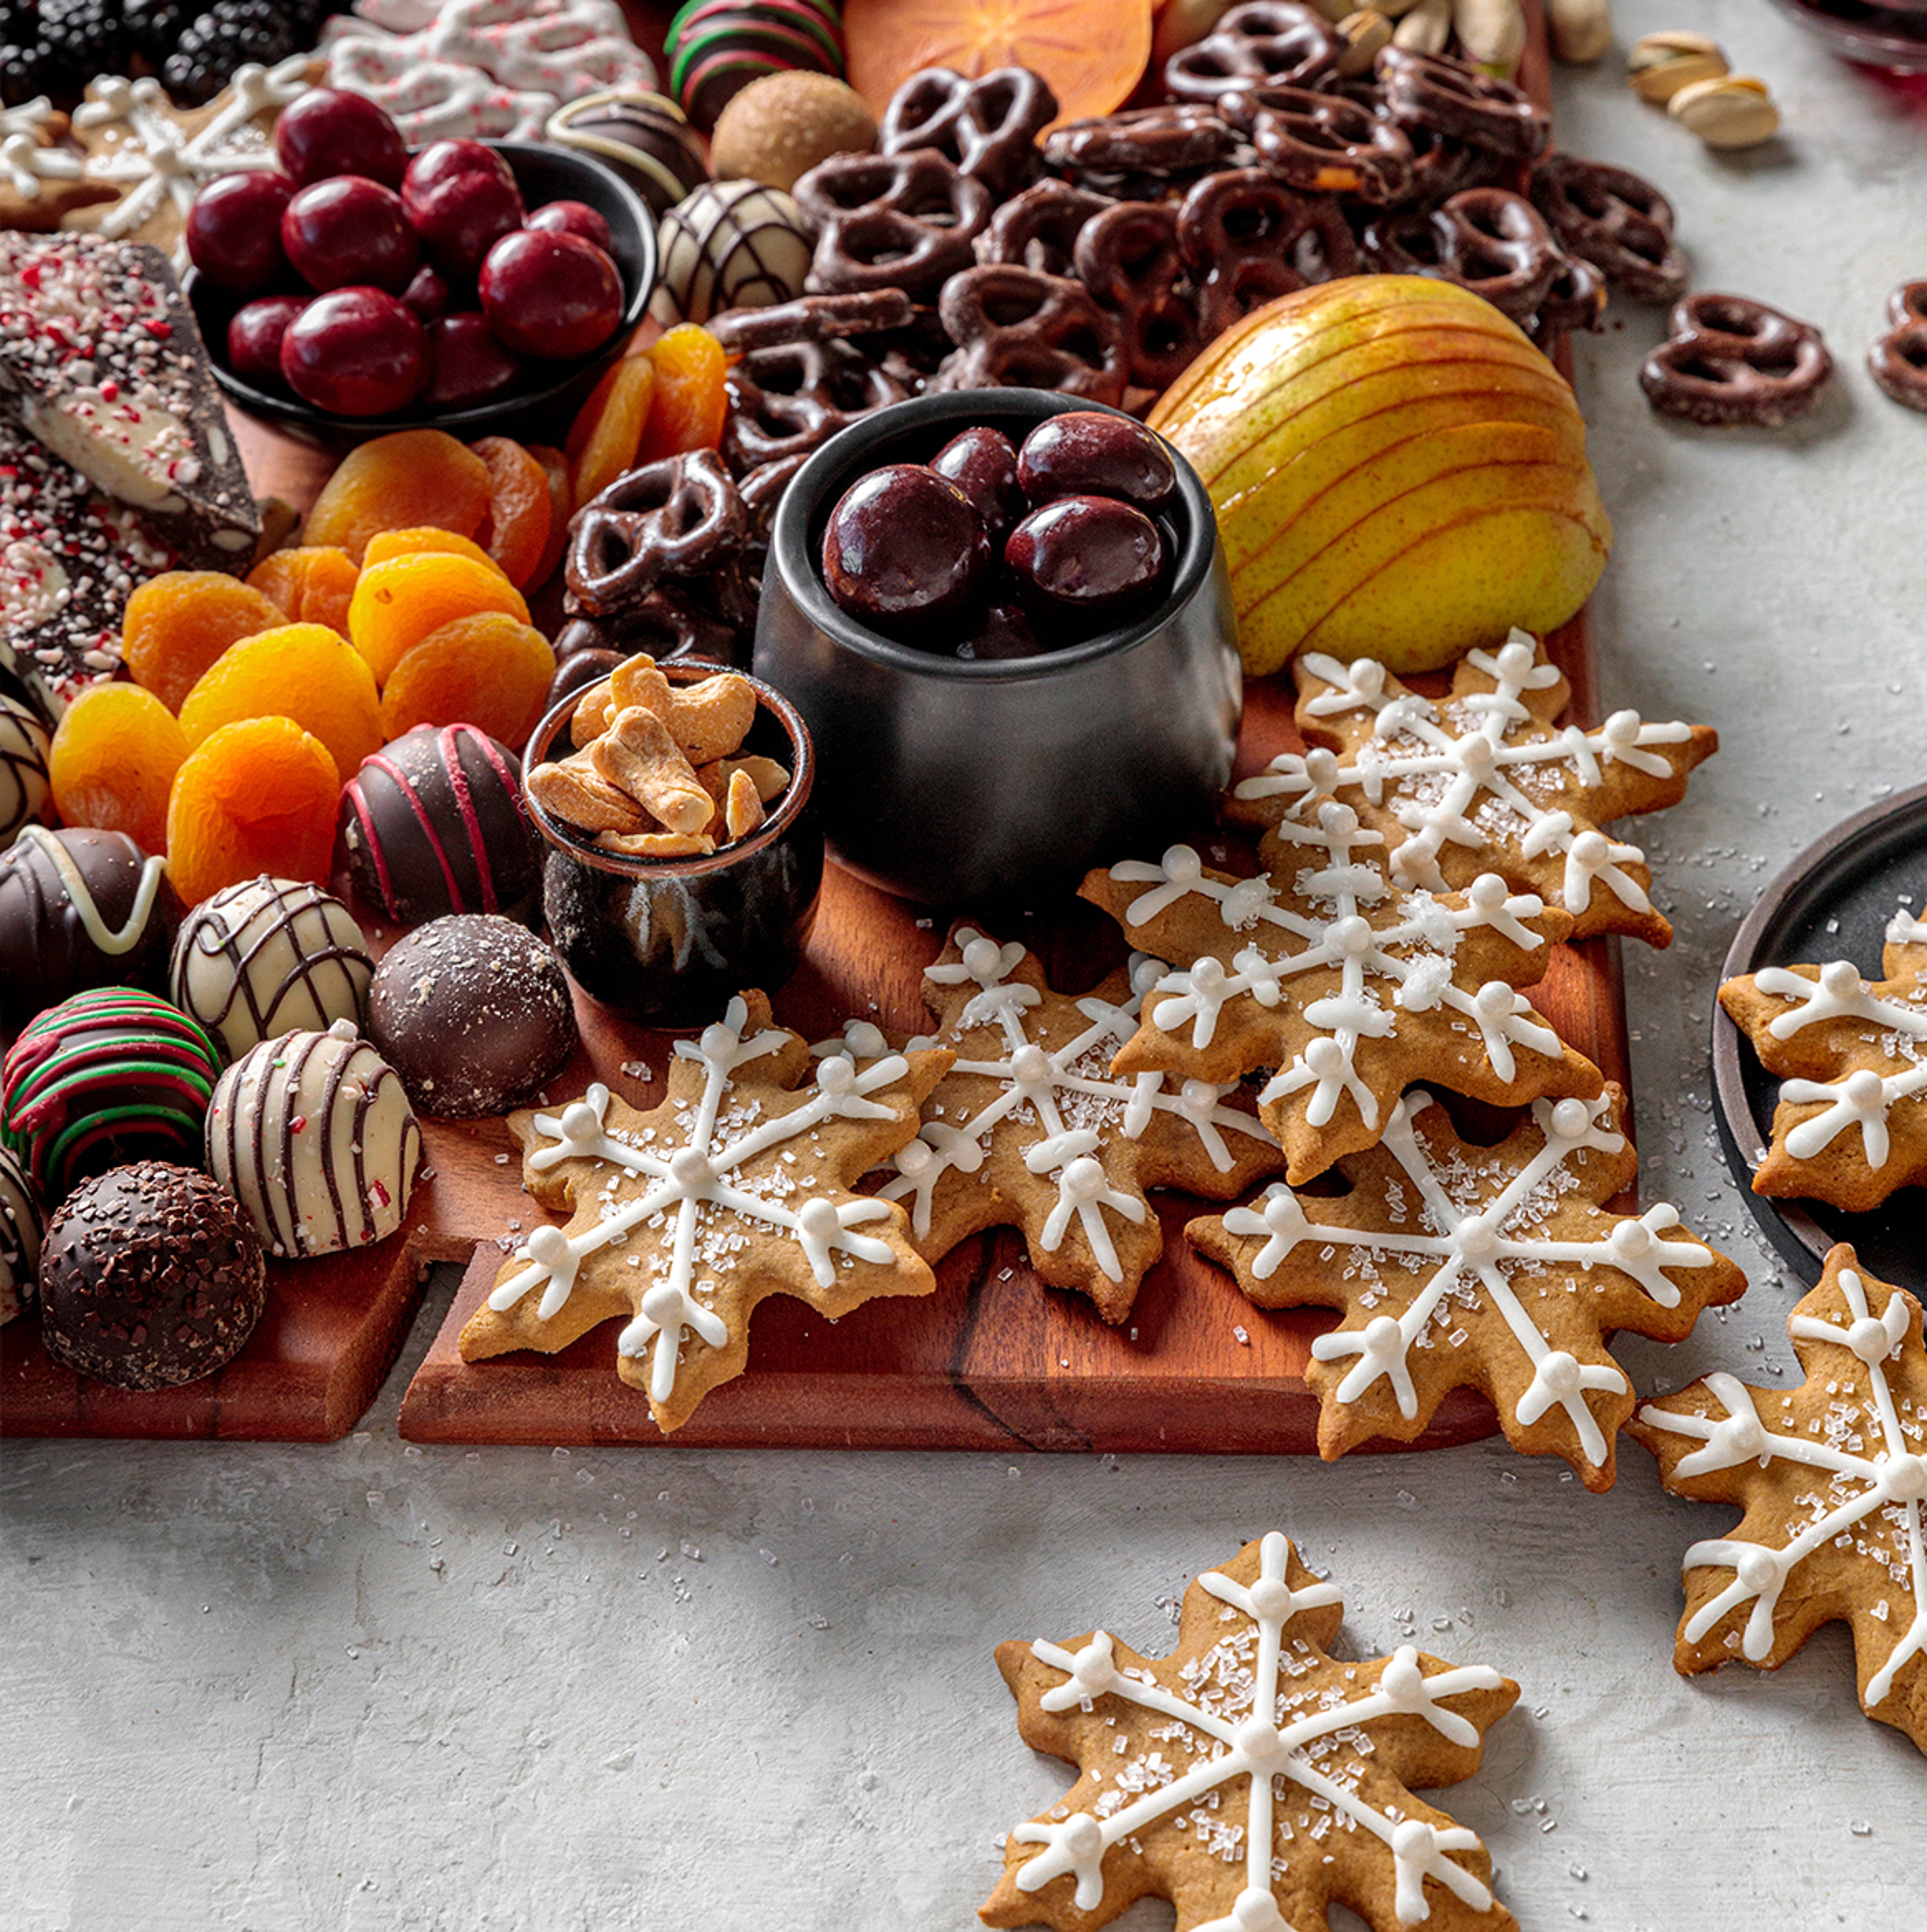
Dessert boards are one of my favorite ways to entertain during the season. They are fun, festive, and absolutely delicious — everything the holidays should be. This board is an epic selection of truffles, seasonal fruits, nuts, bark, and homemade cookies.
This sweets board is so simple to put together and it's a great alternative to baking a dessert like a cake or pie. The best part about these types of boards is you can simply set it and forget it! Serve it after dinner or have it out for grazing at any time during your holiday gathering. But just beware: Once you put it out, it might disappear very quickly...
Similar to building a charcuterie board, it's crucial to use a variety of textures, shapes, and flavors so that there's something for everybody. I added a personal touch with homemade gingerbread snowflake cookies decorated with royal icing and sparkling sugar. If you don't have snowflake cookie cutters, you can use your favorite holiday-themed ones. It's a great way to get the kids and family involved in the festivities.
To drink, I like to offer guests a few options, with wine being the main option. The citrus flavors of the Harry & David Ross Lane Red blend pairs well with all of the items on the dessert board. For the kids, hot cocoa is always a great option.
- 1 board (large enough to hold 2 to 4 small ramekins)
- 2 to 4 ramekins or small bowls
- Fill mini bowls with mixed nuts and chocolate-covered cherries. Arrange them on the board. This helps to lay out the remaining ingredients around them.
- Place the larger items along the edges of the board with the gingerbread cookies and peppermint bark on opposite sides.
- Slice the pears and place on opposite corners. Slice the persimmons and place in an S-curve around a ramekin. Repeat this pattern with the holiday covered pretzels and dried apricots to create a sense of movement that's pleasing to the eye.
- Fill in the holes with bite-sized items such as the chocolate truffles and blackberries. If there are any gaps, you can fill with nuts or add a few rosemary sprigs for a pop of color.
- Place appetizer plates, serving spoons, and take-home bags on the side (the latter for your guests to fill up with their favorites).

- Snowflake cookie cutter (or your favorite holiday one)
- Piping bag with tip
- In a large bowl whisk together the first six dry ingredients and set aside.
- In the bowl of a stand mixer fitted with the whisk attachment, cream the butter, dark brown sugar, and orange zest at medium speed, until light and fluffy, for at least 4 minutes.
- Add the egg, molasses, and vanilla extract, scraping down the sides of the bowl. Mix until combined.
- Add the dry ingredients and mix until fully incorporated.
- Divide the dough into fourths. Form each quarter into a disc, and wrap with plastic. Chill the dough in the refrigerator for at least 2 hours.
- Preheat the oven to 350º F and line baking sheets with parchment paper.
- Remove one dough disk from the refrigerator and place it on a lightly floured surface. Sprinkle flour on top and, using a lightly floured rolling pin, roll the dough until it's 1/4-inch thick. Cut the dough using snowflake cookie cutters and transfer to a baking sheet.
- Re-roll the dough and repeat the process until you have used all the disks. You can always freeze the remaining dough and prepare it during the following week.
- Bake cookies for 8 to 10 minutes. Cool for a few minutes on the baking sheet before transferring to a wire rack.
- Make the icing
- In a large bowl, whisk the icing ingredients together until smooth. The mixture should slowly drip, but should not be runny. If the mixture is too runny, add a little bit more powdered sugar. If it's too thick, add a little bit more water, one teaspoon at a time.
- Transfer to a piping bag with a tip and decorate your cookies when cooled completely.
AUTHOR

Rosana is the Los Angeles-based photographer, stylist, and baker behind the site Yoga of Cooking.